
There is nothing quite like the smell of a roaster just after first crack. If you have ever stood next to one, you know. Roasting green coffee beans turns a hard, grassy seed that tastes of nothing much into the coffee people queue for in the morning. It is part craft, part chemistry and part paying attention, and anyone willing to practise can learn to do it well.
We sell green coffee in bulk to roasters all over the world, from people with a small 1 kg machine in a garage to businesses running big drum roasters every day. A lot of them started with questions, and many of the same ones come up again and again. This guide collects the answers in one long, practical piece. It covers what actually happens to the bean, how to choose coffee for roasting, the equipment, a full step-by-step roast, roast levels, how different origins behave, blending, resting, cupping, common faults and safety. It is written for people who are roasting green coffee beans for the first time and for small roasters who want to tighten up what they already do.

Why start roasting green coffee beans yourself?
People get into roasting for different reasons, but these come up most:
- Freshness. Roasted coffee is at its best for a few weeks. Green coffee keeps for many months. Roasting green coffee beans in small batches means you always have fresh coffee.
- Cost. Green coffee costs far less per kilo than roasted coffee, even after you account for the weight lost in the roaster.
- Control. You decide how light or dark, how sweet or bold. No more guessing what is inside a bag.
- Business. For cafés and coffee brands, roasting in-house is a way to build a product of your own, with your own name on it.
- Curiosity. Some people just love learning how things work. Coffee roasting rewards that.
Whatever your reason, the basics of roasting green coffee beans are the same. Heat goes into the bean, water comes out, a long chain of chemical reactions builds flavour, and at some point you stop the process. Everything else is detail, and the detail is where the fun is.
What happens when roasting green coffee beans
It helps to understand what you are doing to the coffee. You don’t need a chemistry degree, but knowing the stages will make you a much better roaster. The general science of coffee roasting is well documented if you want to go deeper.
1. Drying
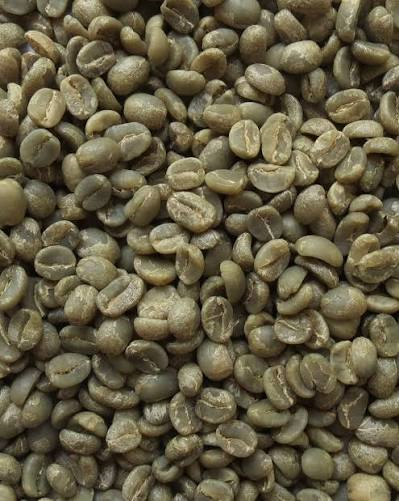
Green coffee holds around 10% to 12% water. In the first few minutes of roasting green coffee beans, that water starts to heat up and leave the bean. The colour shifts from green to a pale yellow, and the smell goes from grassy to something like hay or toasted bread. This phase takes a good share of the roast, often around four to six minutes in a typical drum roaster. Rushing it can leave the inside of the bean under-roasted later on.
2. Browning (the Maillard stage)
Once the bean is dry enough and hot enough, browning reactions take off. Sugars and amino acids react together in what chemists call the Maillard reaction, the same thing that browns bread crust and seared meat. The bean turns from yellow to light brown, it swells, and the smell becomes sweet, nutty and bready. Hundreds of flavour compounds form here. This is the heart of roasting green coffee beans, and how long you spend in this stage has a big effect on body and sweetness.
3. Caramelisation
As temperatures climb further, sugars break down in their own right through caramelisation. This adds caramel, toffee and, if you go far enough, bitter-sweet notes. It also uses up sugars, which is why very dark coffee tastes less sweet and more bitter.
4. First crack
Pressure from steam and gases builds inside the bean until the structure gives way with an audible pop, a bit like popcorn but quieter. That is first crack, usually somewhere around 195 to 200 °C bean temperature, depending on your probe and machine. Once you hear it, the coffee is drinkable. Everything from here on is about how far you take it. For most people roasting green coffee beans, first crack is the moment they start watching the clock closely.
5. Development
The time between the start of first crack and the moment you drop the coffee is called development time. Short development keeps more acidity and origin character. Longer development brings more body, sweetness and roast flavour. Many roasters aim for development of roughly 15% to 25% of the total roast time, but treat that as a starting point, not a rule.
6. Second crack
Keep going and you reach second crack, a quieter, faster, crackling sound around 220 to 225 °C. Oils start to come to the surface and the coffee moves into dark-roast territory. Roast flavours start to take over from origin flavours. Go much further and you get burnt, ashy coffee and a real fire risk.

Choosing coffee before roasting green coffee beans
When roasting green coffee beans, your roast can only be as good as the coffee you start with. A great roaster can’t make poor green coffee taste wonderful. So before you think about profiles, think about what you are putting in the drum.
Arabica or Robusta?
Arabica is sweeter, more aromatic and more acidic. Robusta is stronger, more bitter, heavier and has roughly twice the caffeine. They also roast differently, which we cover further down. Most people roasting green coffee beans for the first time start with Arabica, because it is more forgiving of light and medium roasts and shows more flavour. If you want the full comparison, read our guide to Arabica vs Robusta.
Origin
Where the coffee grew shapes how it tastes and how it behaves in the roaster. High-grown coffee from East Africa is dense and fruity. Brazilian coffee tends to be softer, nutty and chocolatey. Indian and Indonesian Robustas are heavy and earthy. Our African Arabica coffee beans and single-origin Africa Arabica lots are a great introduction to bright, fruity coffee. For espresso blends, look at Brazilian Robusta and Indian Robusta.
Processing
Washed coffees roast cleanly and evenly. Natural coffees, dried in the fruit, can be a little less even and can scorch more easily because of sugars on the surface. Honey-processed coffee sits in between. None of this is a problem, but it is worth knowing when you are roasting green coffee beans from different processes in the same week.
For more on how washed, natural and honey coffees differ in the roaster, read our guide to coffee processing methods.
Grade and size
Even bean size matters a lot. A lot with a narrow screen range, such as 16/18, roasts evenly, because all the beans heat at the same rate. A mixed lot with lots of broken beans or chips will give you some scorched pieces and some under-roasted ones. Our article on coffee bean grading explains screen sizes and defects in detail.
Freshness starts with the harvest date. Our guide to the coffee harvest season shows when new crop arrives from each origin.
Moisture and freshness
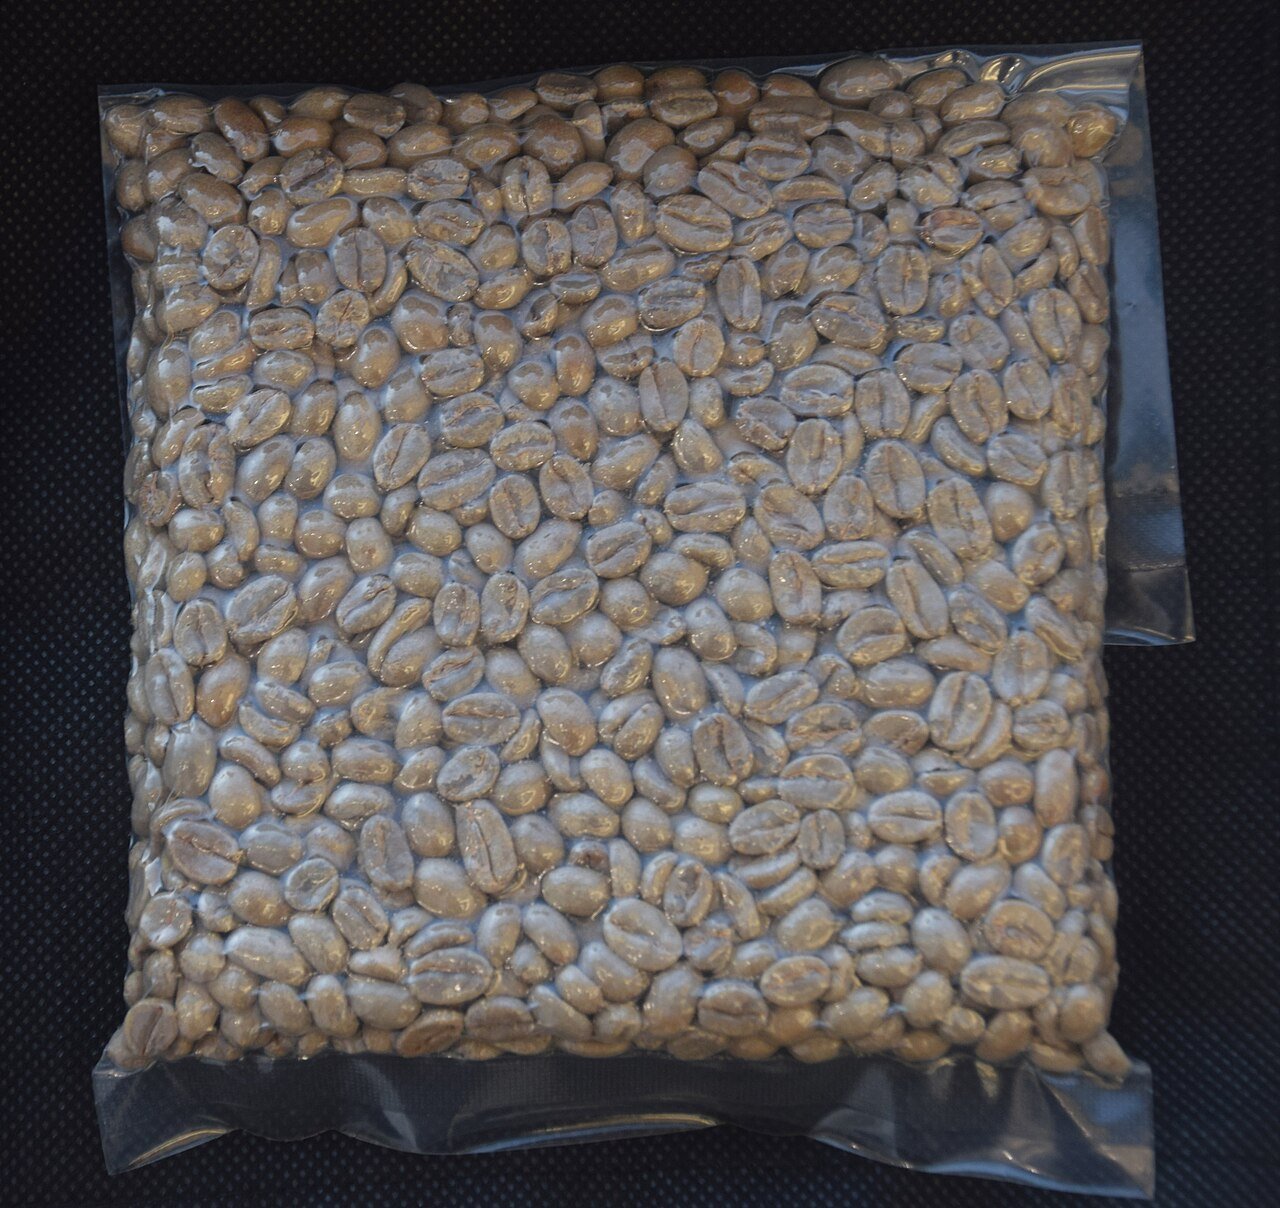
Coffee with moisture around 10% to 12% behaves predictably. Very dry, old coffee roasts faster and can taste flat. Very wet coffee needs a longer drying phase. Ask your supplier for the moisture figure and harvest date. Once you have it, keep it in good condition; our guide to storing green coffee beans explains how.

Equipment for roasting green coffee beans
You can roast coffee with almost anything that makes heat. The question is how much control and consistency you need. Here is what people use, from cheapest to most serious.
Frying pan or wok. The oldest method there is. Cheap, fun, smoky and uneven. Fine for curiosity, not for selling coffee.
Oven. Spread beans on a perforated tray. Better than a pan for even heat, but hard to watch and hard to control.
Popcorn popper. A hot-air popcorn machine is a classic way into roasting green coffee beans at home. Small batches, quick roasts, and you can see and hear everything. Many experienced roasters started this way.
Home air or drum roasters. Purpose-built small machines, usually 100 g to 500 g per batch, with some control over heat and airflow.
Small commercial drum roasters. 1 kg to 15 kg batches. A rotating metal drum, a burner or electric element, airflow control, a cooling tray and usually temperature probes. This is the standard tool for cafés and small roasteries.
Large production roasters. 30 kg and up, for wholesale and supermarket brands, often with automation and afterburners to deal with smoke.

For anyone roasting green coffee beans to sell, a drum roaster with bean temperature and exhaust temperature probes, plus logging software, makes life much easier. You can repeat a roast you liked, instead of trying to remember what you did.
Air roaster or drum roaster?
This is a common question once people outgrow a popper. Air roasters, sometimes called fluid-bed roasters, move the beans in a stream of hot air. They heat quickly and evenly, they are easy to clean, and they often give a clean, bright cup. Drum roasters tumble the beans in a heated metal drum, with heat coming from the drum wall and from hot air passing through. They are the industry standard and many roasters feel they build more body and sweetness.
Both can make excellent coffee. If you are roasting green coffee beans mainly for light filter coffee in small batches, a good air roaster is worth a look. If you plan to sell espresso blends and grow into larger batches, most people end up on a drum roaster. Whatever you choose, buy a machine with reliable temperature probes and good airflow control; those matter more than the brand.
Setting up a space for roasting green coffee beans
- Ventilation. Roasting makes smoke, especially at darker roasts. Commercial roasters vent outside through a chimney or stack. At home, roast by an open window, under a strong extractor hood, or outdoors.
- Chaff. As beans roast, they shed a papery skin called chaff. Drum roasters collect it in a chaff collector or cyclone. Poppers blow it everywhere. Empty chaff collectors often; chaff is very flammable.
- Fire safety. Keep a fire extinguisher suitable for the roaster nearby and never leave a roast unattended.
- Scales and notes. Weigh green coffee before and roasted coffee after. Write everything down.
- Somewhere to cool. Beans keep roasting from their own heat. You need a way to cool them fast.
Rules on roasting and emissions differ around the world, so if you plan a commercial roastery, check local requirements for flues, smoke and fire safety before buying a machine.
Step by step: roasting green coffee beans in a drum roaster
Every machine is different, so treat these numbers as a starting point for roasting green coffee beans on your own equipment. The order of events is what matters.
Step 1: Weigh the batch
Most drum roasters work best at around 50% to 80% of their rated capacity. Overloading makes it hard to get enough heat into the beans. Underloading makes the roast run fast and hot. Weigh your green coffee and note the weight.
Step 2: Preheat
Warm the roaster up properly, ideally for 20 to 30 minutes, so the drum and the whole machine are hot and stable. The first batch of the day often behaves differently from later ones because the metal hasn’t fully heated. Many roasters run a “warm-up” batch first.
Step 3: Charge
Drop the beans into the hot drum. This is called charging, and the temperature at that moment is the charge temperature. For a small drum roaster it is often in the range of about 180 to 220 °C, depending on batch size and coffee. Dense, high-grown coffee usually likes a hotter start than soft, low-grown coffee.
Step 4: Watch the turning point
The cold beans pull the probe temperature down sharply. Within a minute or two it bottoms out and starts climbing again. That low point is the turning point. Note the time and temperature. If it is very different from your usual roast, something has changed: batch size, starting temperature or the coffee itself.
Step 5: Drying phase
The beans move from green to yellow over the next few minutes. Many roasters aim to reach the yellow stage, around 150 to 160 °C, in roughly four to six minutes. Too fast and the outside browns before the middle has dried. Too slow and the coffee can taste flat or “baked”. Most of your heat goes in during this phase.
Step 6: Browning
From yellow to first crack, the coffee browns and builds sweetness and body. This often takes three to five minutes. Watch the rate of rise, the speed at which the bean temperature is climbing. A steadily falling rate of rise is what many roasters aim for. If the temperature stalls or flattens here, the coffee can taste dull.
Step 7: First crack
Listen. The first pops are the start of first crack. Note the time and temperature, and many roasters reduce heat a little here to stop the roast running away, since the beans release energy as they crack.
Step 8: Development
Now decide how far to go. For a light filter roast, you might drop the coffee a minute or so after first crack starts. For a medium espresso roast, perhaps two to three minutes. Watch colour, listen and smell. The coffee changes quickly here, and seconds matter.
Step 9: Drop and cool
Open the door and drop the beans into the cooling tray, with the stirring arms and cooling fan running. Get them down to near room temperature within about four minutes. Slow cooling keeps the roast going and can flatten flavour.
Step 10: Weigh and record
Weigh the roasted coffee and work out the weight loss. Most roasts lose roughly 12% to 20% of their green weight, with darker roasts losing more. Record the batch size, charge temperature, turning point, time to yellow, time to first crack, drop temperature, total time and weight loss. These notes are how you get better at roasting green coffee beans.

Roasting green coffee beans at home
If you are starting small, here is a simple way to begin with a popcorn popper or a heavy pan.
Popcorn popper. Use the kind that blows hot air up from the side, not the kind with a mesh at the bottom. Put in about 60 to 100 g of beans, enough that they move but don’t fly out. Switch on, stir with a wooden spoon if needed, and listen. First crack usually comes after four to six minutes. Stop when you reach the colour you want, tip the beans into a metal colander, and shake them outside or in front of a fan to cool and blow off the chaff.
Heavy pan. Heat a thick pan on medium. Add one layer of beans and keep them moving all the time. It will take longer, often 12 to 20 minutes to first crack, and the roast will be less even, but it works. Cool the same way.
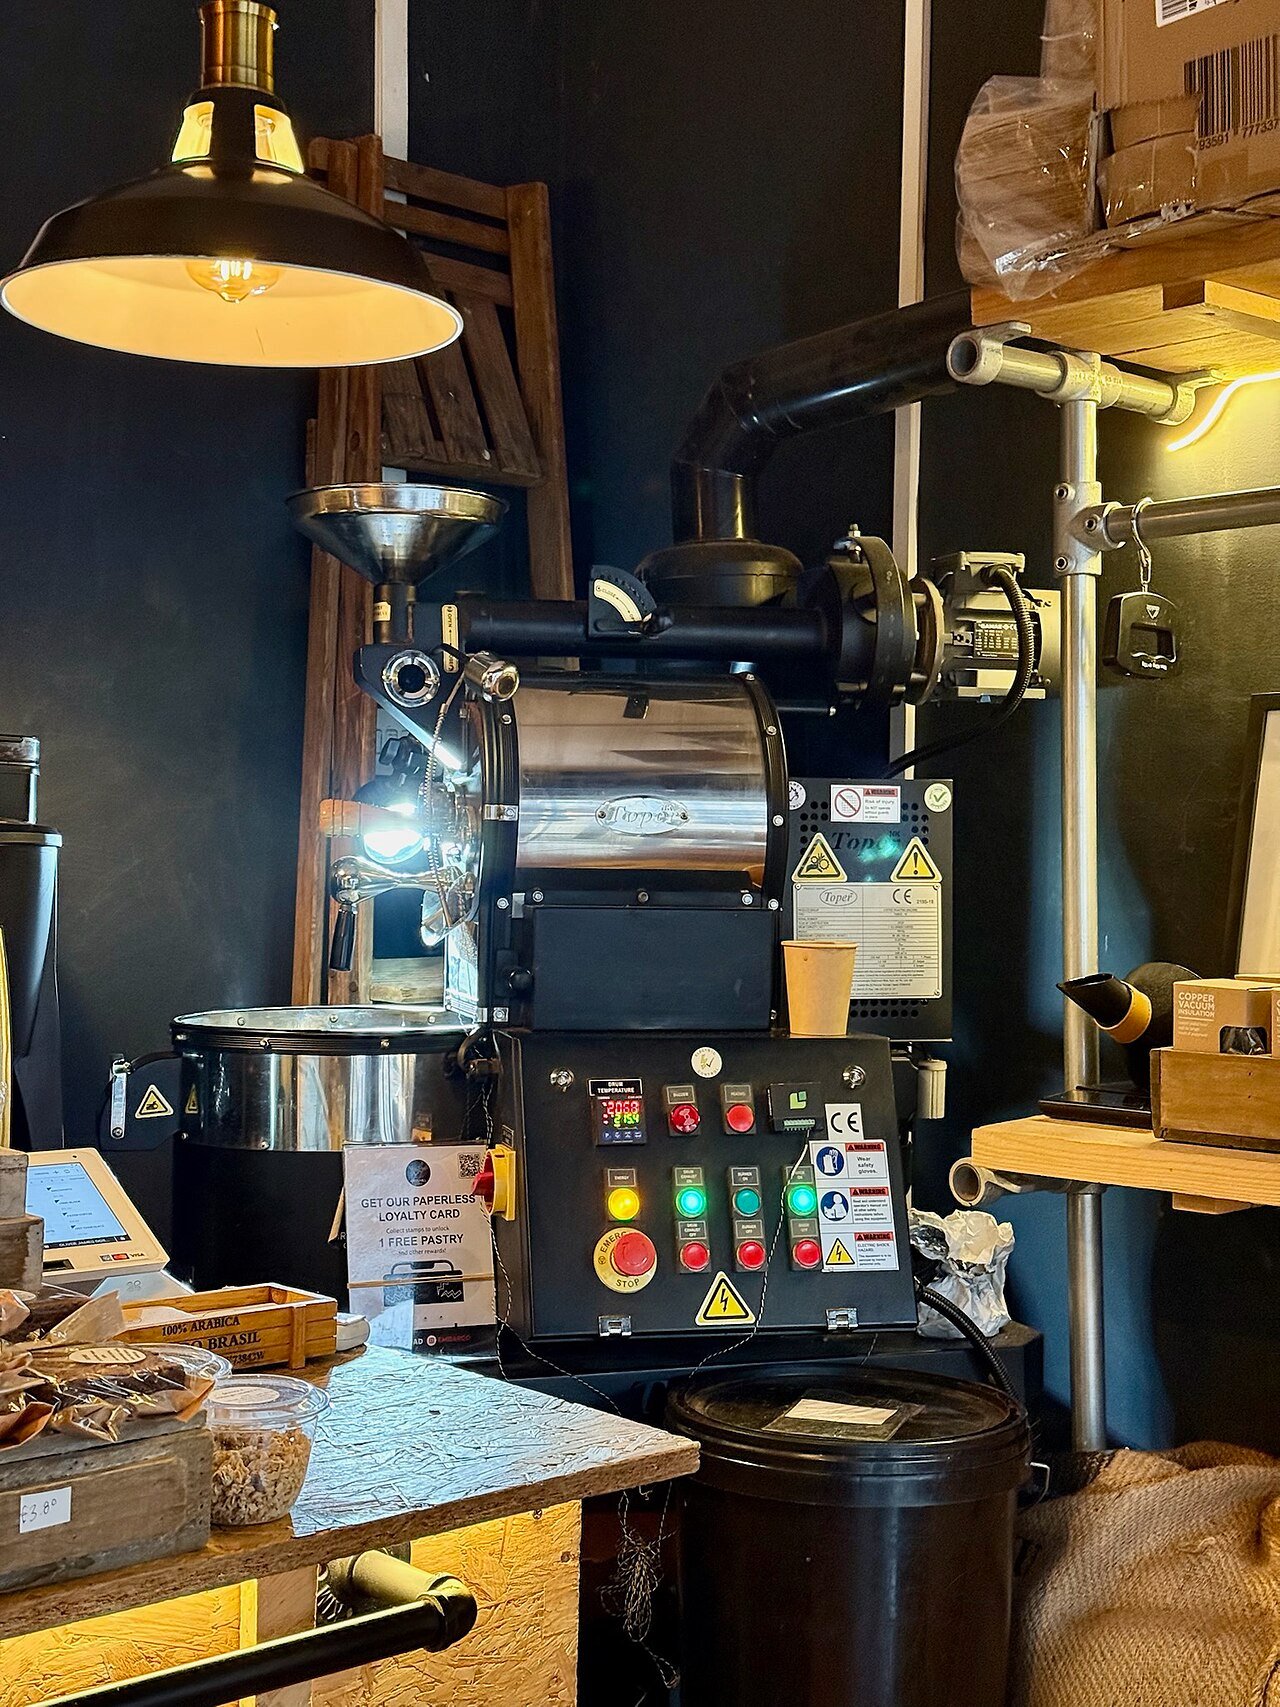
Home roasting is a brilliant way to learn. Many professionals still use a small sample roaster or popper to test new coffee before roasting green coffee beans in bigger batches.
Roast levels when roasting green coffee beans
Temperatures depend heavily on where your probe sits and how your machine reads, so treat these as rough guides. What matters is consistency on your own roaster.
| Roast level | Rough end temperature | Where it stops | What it tastes like |
|---|---|---|---|
| Light | about 200 to 205 °C | just after first crack | bright, acidic, fruity, floral, tea-like |
| Medium | about 205 to 215 °C | well into first crack, before second | balanced, sweet, caramel, chocolate, some acidity |
| Medium-dark | about 215 to 222 °C | end of first crack, edge of second | heavy body, bittersweet, dark chocolate, less acidity |
| Dark | about 222 to 235 °C | into second crack | roasty, smoky, bitter, low acidity, oily beans |
Colour alone can mislead, especially with natural coffees or very dense beans, which can look darker or lighter than they taste. Many roasters use a colour meter, but your palate is the final judge.

A first roast plan for beginners
If you are new to roasting green coffee beans, don’t try to learn everything at once. Here is a simple plan for your first month.
- Pick one coffee. Buy enough of a single, evenly graded washed Arabica or a clean Brazilian Robusta to do at least ten roasts. Using the same coffee means you are only changing your roasting, not the beans.
- Roast to three levels. Do one roast stopped just after first crack, one stopped a minute or two later, and one taken to the edge of second crack.
- Rest and taste. Wait a few days, then brew all three the same way and taste them side by side. You will learn more from that one tasting than from a week of reading.
- Change one thing. Pick the roast you liked best and repeat it, changing only one thing, such as the charge temperature or development time.
- Add a second coffee. Once you can repeat a roast you like, try a different origin and see how it behaves.
Most people roasting green coffee beans for the first time make their biggest jump in quality in these first few weeks, simply by tasting carefully and keeping notes.
Roasting green coffee beans for a café menu
If you roast for your own café or for wholesale customers, think about the menu as a whole. A common setup is one house espresso blend roasted medium to medium-dark, one or two single origins roasted lighter for filter, and perhaps a decaf or a strong “extra” blend with more Robusta. That is three or four coffees to keep consistent, which is a manageable amount for a small roastery.
Rotate your single origins with the seasons so there is always something new to talk about, while keeping the house blend steady. Customers notice when the espresso changes, so be careful when you switch any component of it. When roasting green coffee beans for a blend that customers rely on every day, always test a new lot in a small batch first.
What roasting green coffee beans really saves
Here is a rough way to work out your cost. Say you buy green coffee at a certain price per kilo. Roasting loses about 15% of the weight, so each kilo of green gives you about 850 g of roasted coffee. Divide your green price by 0.85 to get the coffee cost per roasted kilo. Then add your costs for energy, bags, labels, labour and the machine itself.
For most small roasters, even after those extras, roasting green coffee beans in-house costs a good deal less per kilo than buying roasted coffee, and the coffee is fresher. The saving gets bigger as volume grows and as you buy green coffee in larger, better-priced amounts.
Light or dark: what do customers want?
Tastes vary around the world. Specialty cafés in many cities lean light to medium, to show off origin flavours. Traditional espresso markets often prefer medium-dark. Many supermarket shoppers and food-service customers like darker, stronger coffee. In some markets, very dark roasts for strong coffee with milk or sugar are the norm.
The best approach is to roast what your customers enjoy, not what you think they ought to like. Offer a sample of two roast levels, watch what sells, and adjust. Roasting green coffee beans to suit your market is as much about listening as it is about technique.
Roasting green coffee beans: Arabica vs Robusta
Arabica has more sugar and more aromatic compounds. It shows its fruit and acidity at light and medium roasts and can lose its character if pushed too dark. Most Arabica roasts well with a moderate charge temperature, a steady drying phase and careful development after first crack.
Robusta is denser and has less sugar. It often needs a bit more heat early on, and most roasters take it to medium-dark or dark. Under-roasted Robusta can taste raw, grainy and harsh. Well-roasted Robusta tastes of dark chocolate, nuts and wood, with a thick crema in espresso. When roasting green coffee beans of both species for one blend, many roasters roast them separately so each gets the profile it needs.
Roasting green coffee beans by origin
Every origin has its own habits in the drum. Here are notes on the coffees we sell, based on what our customers tell us.
East African Arabica. Dense, high-grown beans. Give them good heat early and don’t rush the drying phase. Light to medium roasts show off the berries, citrus and florals. See our African Arabica and the single-origin Africa Arabica coffee beans.
Brazilian Robusta (Conilon). Softer and lower-grown. It can run fast, so a slightly lower charge temperature helps. Medium-dark brings out chocolate and nuts. Our Brazilian Robusta is one of the easiest Robustas to roast well.
Indian Robusta. Clean, even beans that roast predictably. Great at medium-dark for espresso with a thick crema. Try our Indian Robusta coffee beans.
Ugandan Robusta. Higher-grown and dense for a Robusta. Give it heat early and finish medium to dark for cocoa and spice. See our Ugandan Robusta.
Vietnam Robusta. Screen 16/18, clean and even. Roasts well dark for strong espresso or Vietnamese-style coffee. Our Vietnam Robusta is a popular blend base.
Indonesia Robusta. Heavy and earthy. Medium-dark keeps chocolate and cedar without too much bitterness. See our Indonesia Robusta.
African Robusta. Varies by country, but usually strong and earthy. Medium-dark to dark suits it. Our African Robusta coffee beans work well in espresso and instant blends.
Choosing coffee for espresso? Our guide to coffee beans for espresso covers the best origins, blend ratios and roasting.
Roasting green coffee beans for espresso vs filter
Filter coffee, such as pour-over, drip or batch brew, shows acidity and delicate flavours clearly, so many roasters go lighter: shorter development and a lighter colour. Espresso concentrates everything, including sourness, so most espresso roasts are a bit more developed: medium to medium-dark, with longer development after first crack. That softens acidity and builds sweetness and body.
Some roasters make one “omni” roast for both. It can work, but if you are roasting green coffee beans for a café, separate filter and espresso roasts usually give better results in each cup.

Blending: before or after roasting green coffee beans?
Pre-roast blending means mixing green coffees and roasting them together. It is simple and fast, and it works well when the coffees are similar in size and density. The risk is that one component is under-developed while another is over-roasted.
Post-roast blending means roasting each coffee on its own profile and mixing afterwards. It takes more time but gives you much more control. Most roasters with mixed Arabica and Robusta blends end up blending after roasting green coffee beans separately.
A good starting espresso blend is 70% Arabica and 30% Robusta. Try African Arabica with Indian or Brazilian Robusta, roast each to its sweet spot and blend. Adjust in 5% steps.
Resting coffee after roasting green coffee beans
Freshly roasted coffee is full of carbon dioxide. Brew it straight away and it tastes sharp and uneven, and espresso shots flow badly. Most coffee tastes best after resting: around two to five days for filter roasts, and often five to ten days or more for espresso. Store roasted coffee in bags with one-way valves so gas can escape and air can’t get in.
Resting time is part of roasting green coffee beans well. Plan your roast schedule so coffee is rested when it reaches customers.
Cupping after roasting green coffee beans
Cupping is how the coffee trade tastes coffee in a simple, repeatable way. Grind a measured amount into a cup, pour on hot water, let it steep, break the crust, skim, and taste with a spoon as it cools. You are looking for sweetness, acidity, body, clean taste and any faults. The Specialty Coffee Association publishes a full protocol if you want the formal version.

Cup every new coffee, and cup your regular roasts every so often to check they haven’t drifted. Cupping two or three roasts of the same coffee side by side is the fastest way to learn what changes in your profile actually do.
For the full method, ratios and current SCA standards, read our guide to coffee cupping.
Logging profiles when roasting green coffee beans
A roast profile is the record of a roast: the temperature curve and the main events. Logging software connected to your probes draws this for you and shows the rate of rise. If you can, use it. When you find a roast you love, you can repeat it. When something tastes wrong, you can look back and see what changed.
Even without software, a notebook works. Write down the batch size, charge temperature, turning point, time to yellow, time to first crack, drop time and temperature, weight loss, and how it tasted a few days later. People who keep notes get better at roasting green coffee beans much faster than people who don’t.
Common faults when roasting green coffee beans
- Underdeveloped: grassy, sour, peanut-like, thin. Often from rushing the drying phase or dropping too soon after first crack. Slow the early roast a little or extend development.
- Baked: flat, bready, papery, no sweetness or acidity. Often from a roast that stalled or crawled, especially before first crack. Keep the rate of rise steadily falling, not flattening.
- Scorching: dark burn marks on the flat side of beans. Usually from too much heat at the start or a drum that is too hot for the batch. Lower the charge temperature or increase the batch size.
- Tipping: burnt tips on the ends of beans. Too much heat too early. Ease off at the start.
- Uneven roast: mixed colours. Often from mixed bean sizes, poor drum speed or overloading. Start with evenly graded coffee.
- Quakers: pale beans that won’t brown. These are unripe beans, not a roasting fault. Pick them out after roasting; better green coffee has fewer of them.
- Too bitter or smoky: roasted too dark or too long. Drop earlier.
Safety when roasting green coffee beans
Roasting is safe if you respect it. Never leave a roaster running unattended. Empty chaff collectors regularly and clean the exhaust and chimney, since built-up chaff and oils are the most common cause of roaster fires. Make sure the room is well ventilated, as roasting produces smoke and gases, including carbon monoxide. Keep a suitable fire extinguisher close by and know how to shut off the fuel or power quickly. With commercial machines, follow the manufacturer’s instructions and local rules.
For current market levels and how quotes are built, see our guide to green coffee prices.
Not sure who to buy from? Our guide to choosing a green coffee supplier covers specs, samples, contracts, Incoterms and red flags.
Scaling up into a coffee business
Lots of successful roasteries began with someone roasting green coffee beans in a popcorn popper. If you are heading that way, a few things change as you grow:
- Consistency matters more than anything. Customers expect the same coffee every week. Logging and cupping become essential.
- Green coffee becomes your biggest cost. Buying in bulk, comparing landed costs and planning shipments make a big difference. Our guide to wholesale green coffee beans covers buying in volume.
- Supply planning. You will need steady stock of your core coffees. If you buy from abroad, read our guide to importing coffee beans.
- Storage. More stock means more to protect. Keep it cool, dry and rotated.
- Rules. Food business registration, labelling and emissions rules apply in many places once you sell coffee.
Green coffee for roasting from us
We supply graded green coffee for roasting green coffee beans at every scale, from trial orders to full containers, shipped worldwide. Every lot is checked for moisture, screen size and defects before it leaves. Our current range:
- African Arabica: bright and fruity, great for light and medium roasts.
- Africa Arabica: single-origin lots from Ethiopia, Kenya, Uganda and more.
- Brazilian Robusta: smooth, low-acid and forgiving in the roaster.
- Indian Robusta: clean, with a thick crema for espresso.
- Ugandan Robusta: high-grown, chocolatey and full-bodied.
- Vietnam Robusta: Screen 16/18, strong and good value.
- Indonesia Robusta: heavy body with cedar and dark chocolate.
- African Robusta: strong and earthy for espresso and instant.
Browse the Arabica and Robusta categories, see all our products, or read more on our blog.
Looking for coffees with a clear origin story? Our guide to single origin coffee beans explains what single origin means, how traceability works and how to build a menu that sells.
For a full buyer’s guide to origins, varieties, grades and prices, see our guide to Arabica coffee beans.
Frequently asked questions
How long does roasting green coffee beans take?
In a drum roaster, usually about 9 to 15 minutes. In a popcorn popper, often 5 to 8 minutes. In a pan, 12 to 20 minutes or more.
How much weight do green beans lose when roasted?
Roughly 12% to 20%, mostly water. Darker roasts lose more.
What temperature is first crack?
Usually somewhere around 195 to 200 °C bean temperature, though probes and machines read differently.
Can I start roasting green coffee beans at home?
Yes. A hot-air popcorn popper or heavy pan is enough to start. Good ventilation is the main thing.
Which coffee is best for beginners?
A washed Arabica with even bean size, or a clean Brazilian Robusta for darker roasts. Both are forgiving.
How long should roasted coffee rest?
Two to five days for filter, often a week or more for espresso.
Should I roast Arabica and Robusta together?
You can, but most roasters get better results roasting them separately and blending afterwards.
How much green coffee should I buy?
Enough to roast within a few months while it is fresh. Start with a trial order and grow from there.
Final thoughts
Roasting green coffee beans is one of those skills that takes an afternoon to start and years to master, and that is part of the appeal. Start with good, evenly graded green coffee. Learn the stages. Keep notes. Cup your results. Change one thing at a time. You will be surprised how quickly your coffee improves.
When you are ready to buy green coffee, send us what you are looking for, how much you need and where you are through our contact page. We will send a quote and a sample to try in your roaster. You can also read more about us or follow an order on our tracking page.

Pingback: Coffee Beans for Cold Brew: 8 Proven Picks for Smooth Flavor - Continental Coffee Supply
Pingback: Coffee Beans for Instant Coffee: 7 Proven Origins Buyers Trust - Continental Coffee Supply